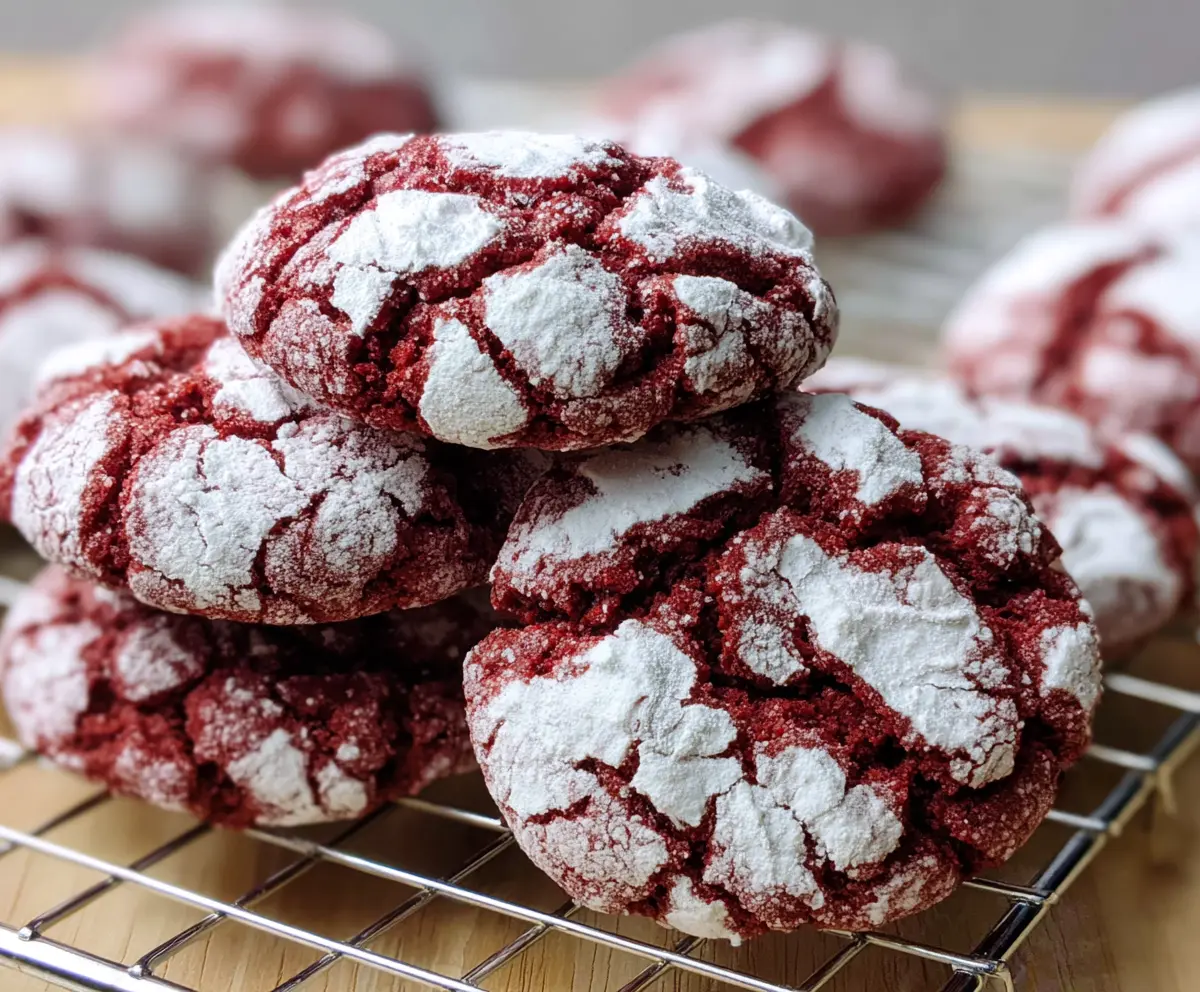
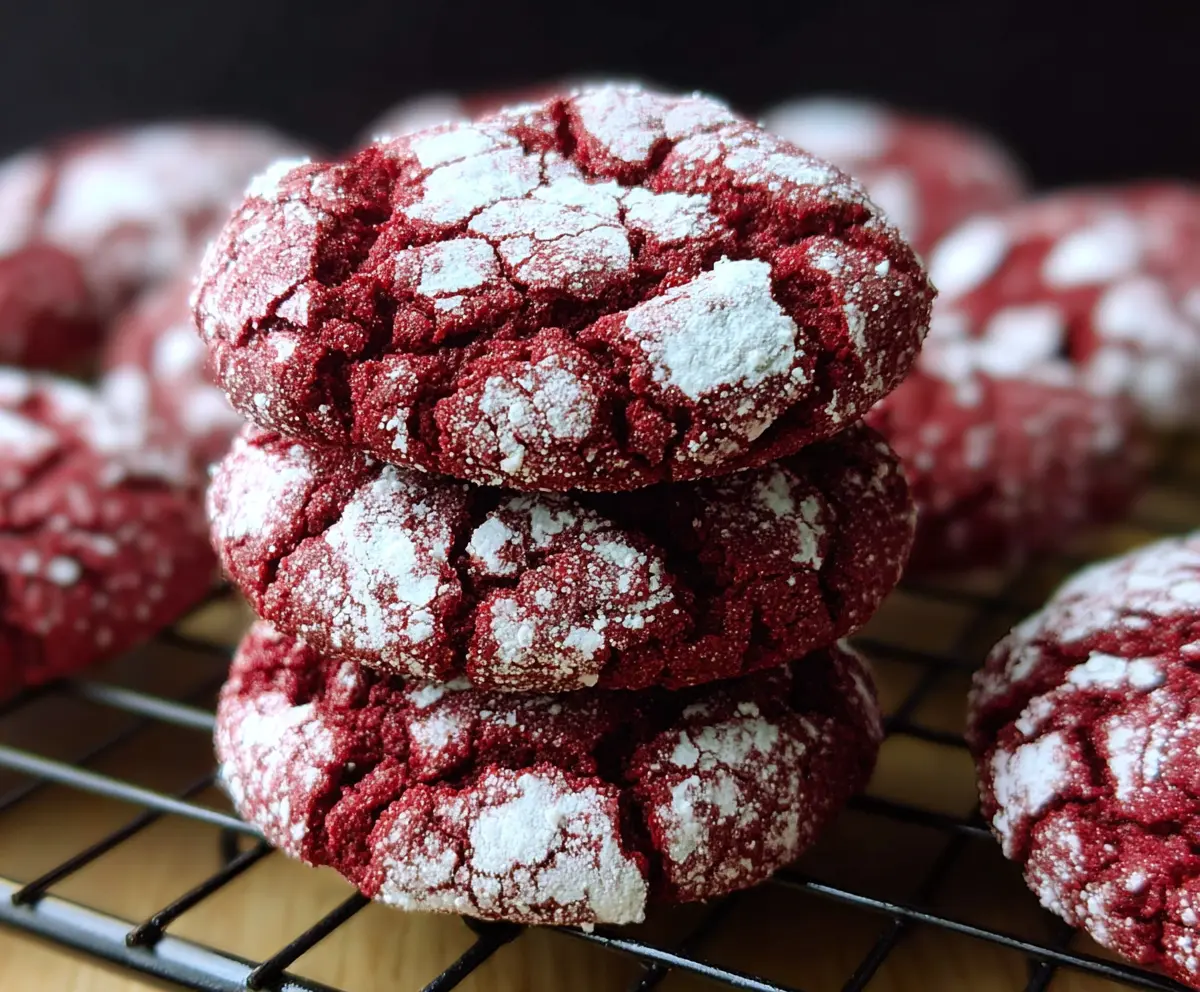
Red Velvet Crinkle Cookies are soft, chewy treats with that classic red velvet flavor wrapped in a lovely powdered sugar coating. The crinkled tops make them look as fun as they taste, with a hint of cocoa and a touch of sweetness that everyone loves. They’re the perfect cookie for any time you want something special but not too complicated.
I love making these cookies when I want to add a pop of color to my snack table or dessert spread. The best part is watching the powdered sugar crack as the cookies bake, giving them that signature crinkle look. It always feels like a little surprise every time I open the oven. Plus, they’re easy to share with friends and family, and they never last long in my house!
These cookies go great with a glass of cold milk or a cup of hot coffee. I sometimes pack a few in a little bag to bring along when I visit someone, and they’re an instant hit. If you’re looking for a fun and festive cookie that tastes just as good as it looks, these Red Velvet Crinkle Cookies are a great choice!
Key Ingredients & Substitutions
All-purpose flour: This gives structure to the cookies. For a gluten-free option, try a 1-to-1 gluten-free flour blend. Just keep in mind the texture may change slightly.
Cocoa powder: Unsweetened cocoa adds that subtle chocolate flavor. Dutch-process cocoa works well here too and gives a deeper color.
Butter: I always use unsalted butter for better control of saltiness. Room temperature butter beats up nicely with sugar to create a light texture.
Red food coloring: This is key for that vibrant red color. Gel food coloring is best—it doesn’t thin the dough. Natural options like beet juice can be used but may not be as bright.
Vinegar: Vinegar reacts with baking powder to help the cookies rise and gives a slight tang, which balances the sweetness.
Powdered sugar: Rolling the dough balls in powdered sugar before baking gives the signature crinkle effect and a sweet contrast.
How Do You Get Those Perfect Red Velvet Crinkles?
The secret to those stunning cracked tops is chilling the dough first. This firms up the dough, so it doesn’t spread too fast in the oven.
- Chill the dough for at least 1 hour; longer for easier handling.
- Roll the dough balls generously in powdered sugar to form a thick coating.
- Space cookies well on the tray to give room for spreading.
- Bake just until set but still soft inside—overbaking can dry them out.
Following these tips helps the sugar crack beautifully, making each cookie look as great as it tastes!
Equipment You’ll Need
- Mixing bowls – you’ll need one for dry ingredients and another for creaming butter and sugar.
- Electric mixer or hand mixer – makes beating butter and sugar quick and fluffy.
- Measuring cups and spoons – for accurate ingredient amounts to get the right texture and flavor.
- Baking sheet – a flat cookie sheet works best for even baking and spreading.
- Parchment paper or silicone baking mat – prevents sticking and makes cleanup easier.
- Cookie scoop or tablespoon – helps form uniform dough balls for even baking.
- Wire cooling rack – lets cookies cool evenly so they don’t get soggy underneath.
Flavor Variations & Add-Ins
- Add white chocolate chips for extra sweetness and a nice texture contrast inside the cookies.
- Try substituting half the cocoa powder with melted chocolate to deepen the chocolate flavor.
- Mix in chopped pecans or walnuts to add crunch and a nutty note.
- Swap red food coloring for natural beet powder for a subtle earthy color and flavor twist.
Red Velvet Crinkle Cookies
Ingredients You’ll Need:
- 1 cup (125g) all-purpose flour
- 2 tablespoons unsweetened cocoa powder
- 1/2 teaspoon baking powder
- 1/4 teaspoon salt
- 1/2 cup (115g) unsalted butter, softened
- 3/4 cup (150g) granulated sugar
- 1 large egg
- 1 tablespoon milk
- 1 teaspoon vanilla extract
- 1 teaspoon white or apple cider vinegar
- 1 tablespoon red food coloring
- 1 cup powdered sugar (for rolling)
How Much Time Will You Need?
This recipe takes about 15 minutes to prepare, plus at least 1 hour chilling time for the dough. Baking the cookies takes around 10-12 minutes each batch. Overall, plan for about 1 hour and 30 minutes from start to finish including cooling time.
Step-by-Step Instructions:
1. Prepare Your Oven and Dry Ingredients:
Set the oven to 350°F (175°C). Line a baking sheet with parchment paper or a silicone baking mat to keep your cookies from sticking. In a medium bowl, whisk together the flour, cocoa powder, baking powder, and salt to mix the dry ingredients evenly.
2. Mix Wet Ingredients:
In a large bowl, beat the softened butter and granulated sugar together until the mixture is light and fluffy. Then add the egg, milk, vanilla extract, vinegar, and red food coloring. Mix well until everything is fully combined and smooth.
3. Combine and Chill the Dough:
Slowly add the dry ingredients into the wet ingredients, stirring just until you form a soft dough. Avoid overmixing to keep the cookies tender. Cover the dough and chill it in the refrigerator for at least 1 hour, which makes it easier to handle and helps create that perfect crinkle effect.
4. Shape and Coat the Cookies:
Once chilled, scoop out small portions of dough with a tablespoon or cookie scoop and roll each into a ball. Roll each ball generously in powdered sugar to coat them well – this sugar coating is key to those pretty cracked tops.
5. Bake and Cool:
Place the coated balls on your prepared baking sheet about 2 inches apart to allow room for spreading. Bake for 10–12 minutes until the tops are nicely cracked but the centers stay soft. Remove from the oven and let the cookies cool on the baking sheet for 5 minutes, then transfer to a wire rack to cool completely.
6. Enjoy!
Now you can enjoy your soft, chewy Red Velvet Crinkle Cookies—perfect with milk, coffee, or on their own as a delicious treat.
Can I Use Gel Food Coloring Instead of Liquid?
Yes! Gel food coloring works great because it provides vibrant color without thinning the dough. Just use the same amount or a little less since gel is more concentrated.
Can I Make the Dough Ahead of Time?
Absolutely! You can prepare the dough, roll it into balls, coat with powdered sugar, and freeze them on a tray. Once frozen, transfer to an airtight container for up to 3 months. Bake from frozen, adding a few extra minutes to the baking time.
How Should I Store Leftover Cookies?
Store cooled cookies in an airtight container at room temperature for up to 4 days. You can also freeze them for longer storage—just thaw at room temperature before enjoying.
What’s a Good Way to Serve These Cookies?
They’re delicious on their own or paired with a glass of cold milk, hot coffee, or tea. Their chewy texture and sweet cocoa flavor make them perfect for any occasion!