The first thing I watch is the skin: it needs time against the hot pot to brown before the lid goes on. Pressure cooking won’t brown it for you, so that initial sear does more than make the turkey look good. It also leaves browned bits in the pot that become the base for the gravy.
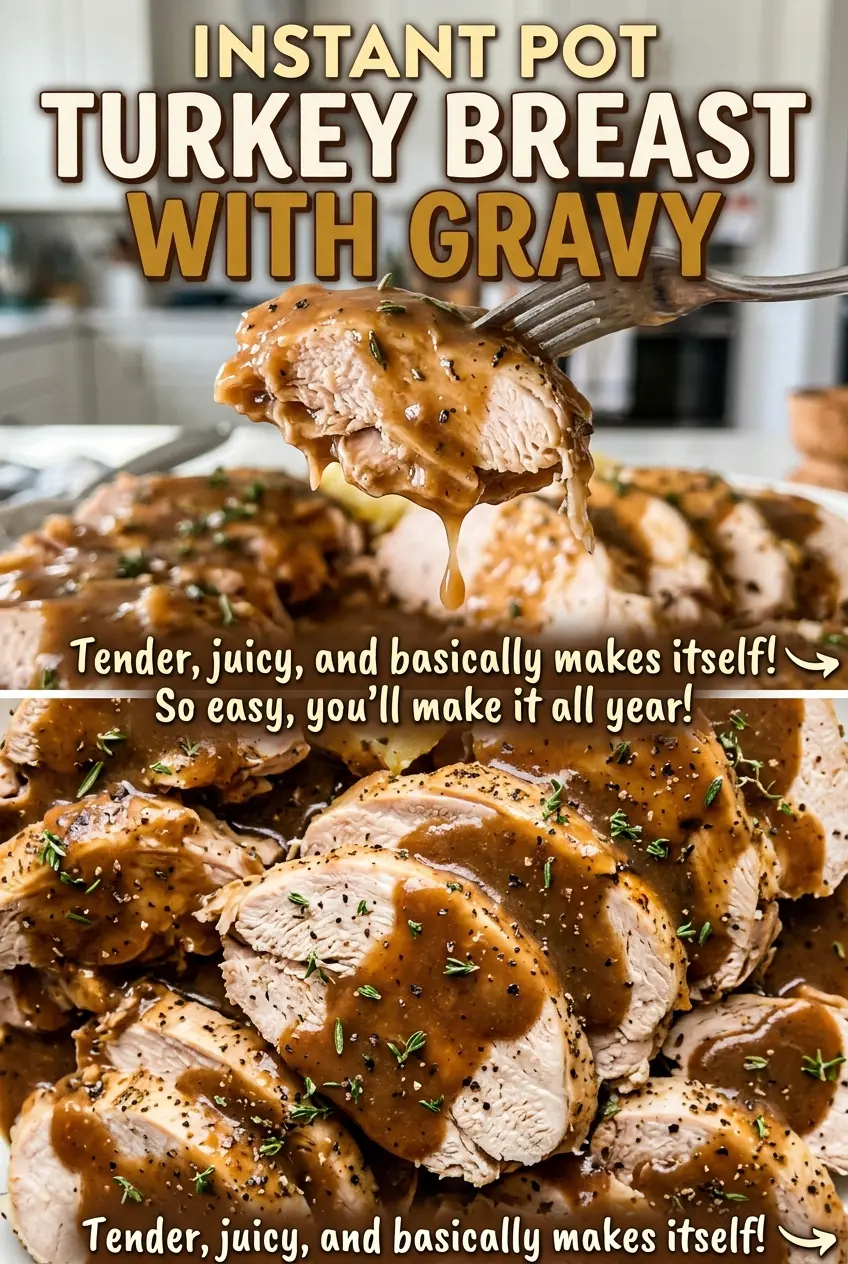
For this Instant Pot turkey breast with gravy, I use a bone-in, skin-on breast and let the cooker handle the longer part of the meal. The onion, garlic, and broth gather flavor underneath the turkey while it cooks, and the strained liquid becomes a quick gravy with a cornstarch slurry. Give the breast its resting time before carving, and you’ll have slices ready to serve with warm gravy.
Kitchen Note
Give the turkey the full 15-minute rest before carving. Cutting too soon lets the juices run onto the board instead of staying with the slices.
Save this Instant Pot turkey breast with gravy for browned skin, tender slices, and a quick homemade gravy.
Why the Browning Happens Before the Pressure Cooking
It’s easy to expect the pressure cooker to do all the work, but pressure cooking uses moist heat. That cooks the turkey; it doesn’t create the same browned surface you get from direct contact with a hot pot. Searing skin-side down first gives you that color before the turkey goes onto the rack.
The browned bits left behind are useful, too. When the broth goes in, scrape them up rather than leaving them stuck to the bottom. They dissolve into the cooking liquid, and that liquid carries the flavor into the gravy. This is why the order matters: sear first, loosen the browned bits with broth, then cook the turkey above the liquid. You get a better starting point for the gravy without needing a separate pan.
The skin is there for the sear and the flavor it leaves in the pot, not because pressure cooking will keep it crisp. If crisp skin is your priority, this pressure-cooker method isn’t designed to deliver that texture; the payoff here is a cooked turkey breast and gravy made from its cooking liquid.
What the Broth, Aromatics, and Slurry Each Contribute

- Bone-in, skin-on turkey breast — Use a breast that’s fully thawed so it cooks predictably and can be seared before pressure cooking. The bone and skin are part of the cut this timing is built around; a boneless or skinless piece won’t behave the same way.
- Kosher salt, black pepper, and dried thyme — These season the turkey directly, while dried thyme brings an even herbal note without adding moisture to the skin. Use fresh, fragrant dried thyme; there’s no need for a specialty brand. A premixed seasoning blend isn’t a straightforward swap because its salt content and flavor vary.
- Neutral oil — This helps the skin make contact with the hot pot without bringing a strong flavor of its own. Any neutral oil you already use for sautéing works; the important distinction is neutral rather than strongly flavored.
- Yellow onion and garlic — They soften in the pot and lend their flavor to the broth as the turkey cooks. Quartering the onion and smashing the cloves lets them release flavor while keeping the pieces large enough to strain out easily.
- Low-sodium chicken broth — A low-sodium broth gives the gravy a savory base without adding as much salt as regular broth. A low-sodium turkey broth is a useful swap if you want a more turkey-forward gravy; use it in both portions.
- Cornstarch — It thickens the strained cooking liquid quickly without flour. Cold water lets you whisk it into a smooth slurry first; adding dry cornstarch straight to hot liquid is more likely to leave lumps.
The Sear, Pressure Release, and Gravy Stages That Matter
Brown the Skin Before Building the Cooking Liquid
Pat the thawed turkey breast dry, then rub it all over with the salt, pepper, and dried thyme. Set a 6-quart Instant Pot to Sauté and heat the neutral oil. Sear the turkey skin-side down for 6–8 minutes, until the skin is browned, then move it to a plate. If the skin is still pale, give it the full searing time rather than rushing to the pressure-cooking step.
Soften the Aromatics and Set the Turkey on the Rack
Add the quartered onion and smashed garlic to the pot and cook, stirring, for 2–3 minutes, until the onion begins to soften. Pour in 1 cup of broth and scrape up the browned bits from the bottom. Set the rack in the pot and place the turkey on it skin-side up, above the liquid. Lock the lid and cook at high pressure for 24 minutes.
Release Pressure, Check the Thickest Part, and Rest
Let the pressure release naturally for 10 minutes, then quick-release the remaining pressure. Check the thickest part of the breast without touching the bone; it should reach 165°F. If it hasn’t, pressure-cook for 3 more minutes and check again. Transfer the turkey to a cutting board and let it rest for 15 minutes before carving.
Turn the Strained Liquid into Gravy
Strain the cooking liquid into a heatproof measuring cup and skim off the fat, then discard the solids. Add the remaining 1 cup of broth to the liquid. Set the Instant Pot to Sauté and bring it to a simmer while you whisk the cornstarch and cold water together until smooth. Whisk the slurry into the simmering liquid and cook for 1–2 minutes, until thickened.
Useful Swaps for the Broth and the Gravy
Use low-sodium turkey broth
Replace the chicken broth with low-sodium turkey broth in both portions. The gravy takes on a more pronounced turkey flavor, while the low-sodium choice keeps the seasoning easier to manage.
Make a larger batch of gravy
Increase the broth and scale up the cornstarch slurry in the same proportion, keeping the cornstarch and cold water equal. The extra gravy will be a little less concentrated, so use the turkey’s strained cooking liquid as the flavor base rather than replacing it all with plain broth.
Keep the gravy gluten-free
Cornstarch thickens this gravy without wheat flour. Choose a broth labeled gluten-free if you’re cooking for someone who needs to avoid gluten, and keep the cornstarch slurry as the thickener.
Storage and Reheating
- Refrigerator: Refrigerate the turkey and gravy within 2 hours and use within 3–4 days. The turkey may firm up as it chills.
- Freezer: Freeze sliced turkey and gravy separately in airtight containers for up to 2–3 months for best quality. Thaw them in the refrigerator before reheating.
- Reheating: Warm the turkey covered with a little gravy, and heat the gravy separately over low heat, whisking as it warms. Avoid boiling the gravy hard or heating the turkey uncovered for too long, which can dry the slices.
Questions About Instant Pot Turkey Breast
Instant Pot Turkey Breast with Gravy
Ingredients
Equipment
Method
- Pat the turkey breast dry.
- Rub the turkey breast all over with the salt, pepper, and thyme.
- Set a 6-quart Instant Pot to Sauté and heat the oil.
- Sear the turkey skin-side down for 6–8 minutes, until browned, then transfer it to a plate.
- Add the onion and garlic to the pot and cook for 2–3 minutes, stirring, until the onion begins to soften.
- Pour in 1 cup of the broth and scrape up any browned bits.
- Place the rack in the pot and set the turkey on it, skin-side up.
- Lock the lid and cook at high pressure for 24 minutes.
- Let the pressure release naturally for 10 minutes before quick-releasing the rest.
- Check that the thickest part of the breast reaches 165°F without touching the bone.
- If needed, pressure-cook for 3 more minutes and check again.
- Transfer the turkey to a cutting board.
- Rest it for 15 minutes before carving.
- Strain the cooking liquid into a heatproof measuring cup and skim off the fat.
- Discard the solids, then add the remaining 1 cup broth.
- Set the Instant Pot to Sauté and bring the liquid to a simmer.
- Whisk the cornstarch and cold water together until smooth.
- Whisk the slurry into the simmering liquid.
- Cook for 1–2 minutes, until thickened.