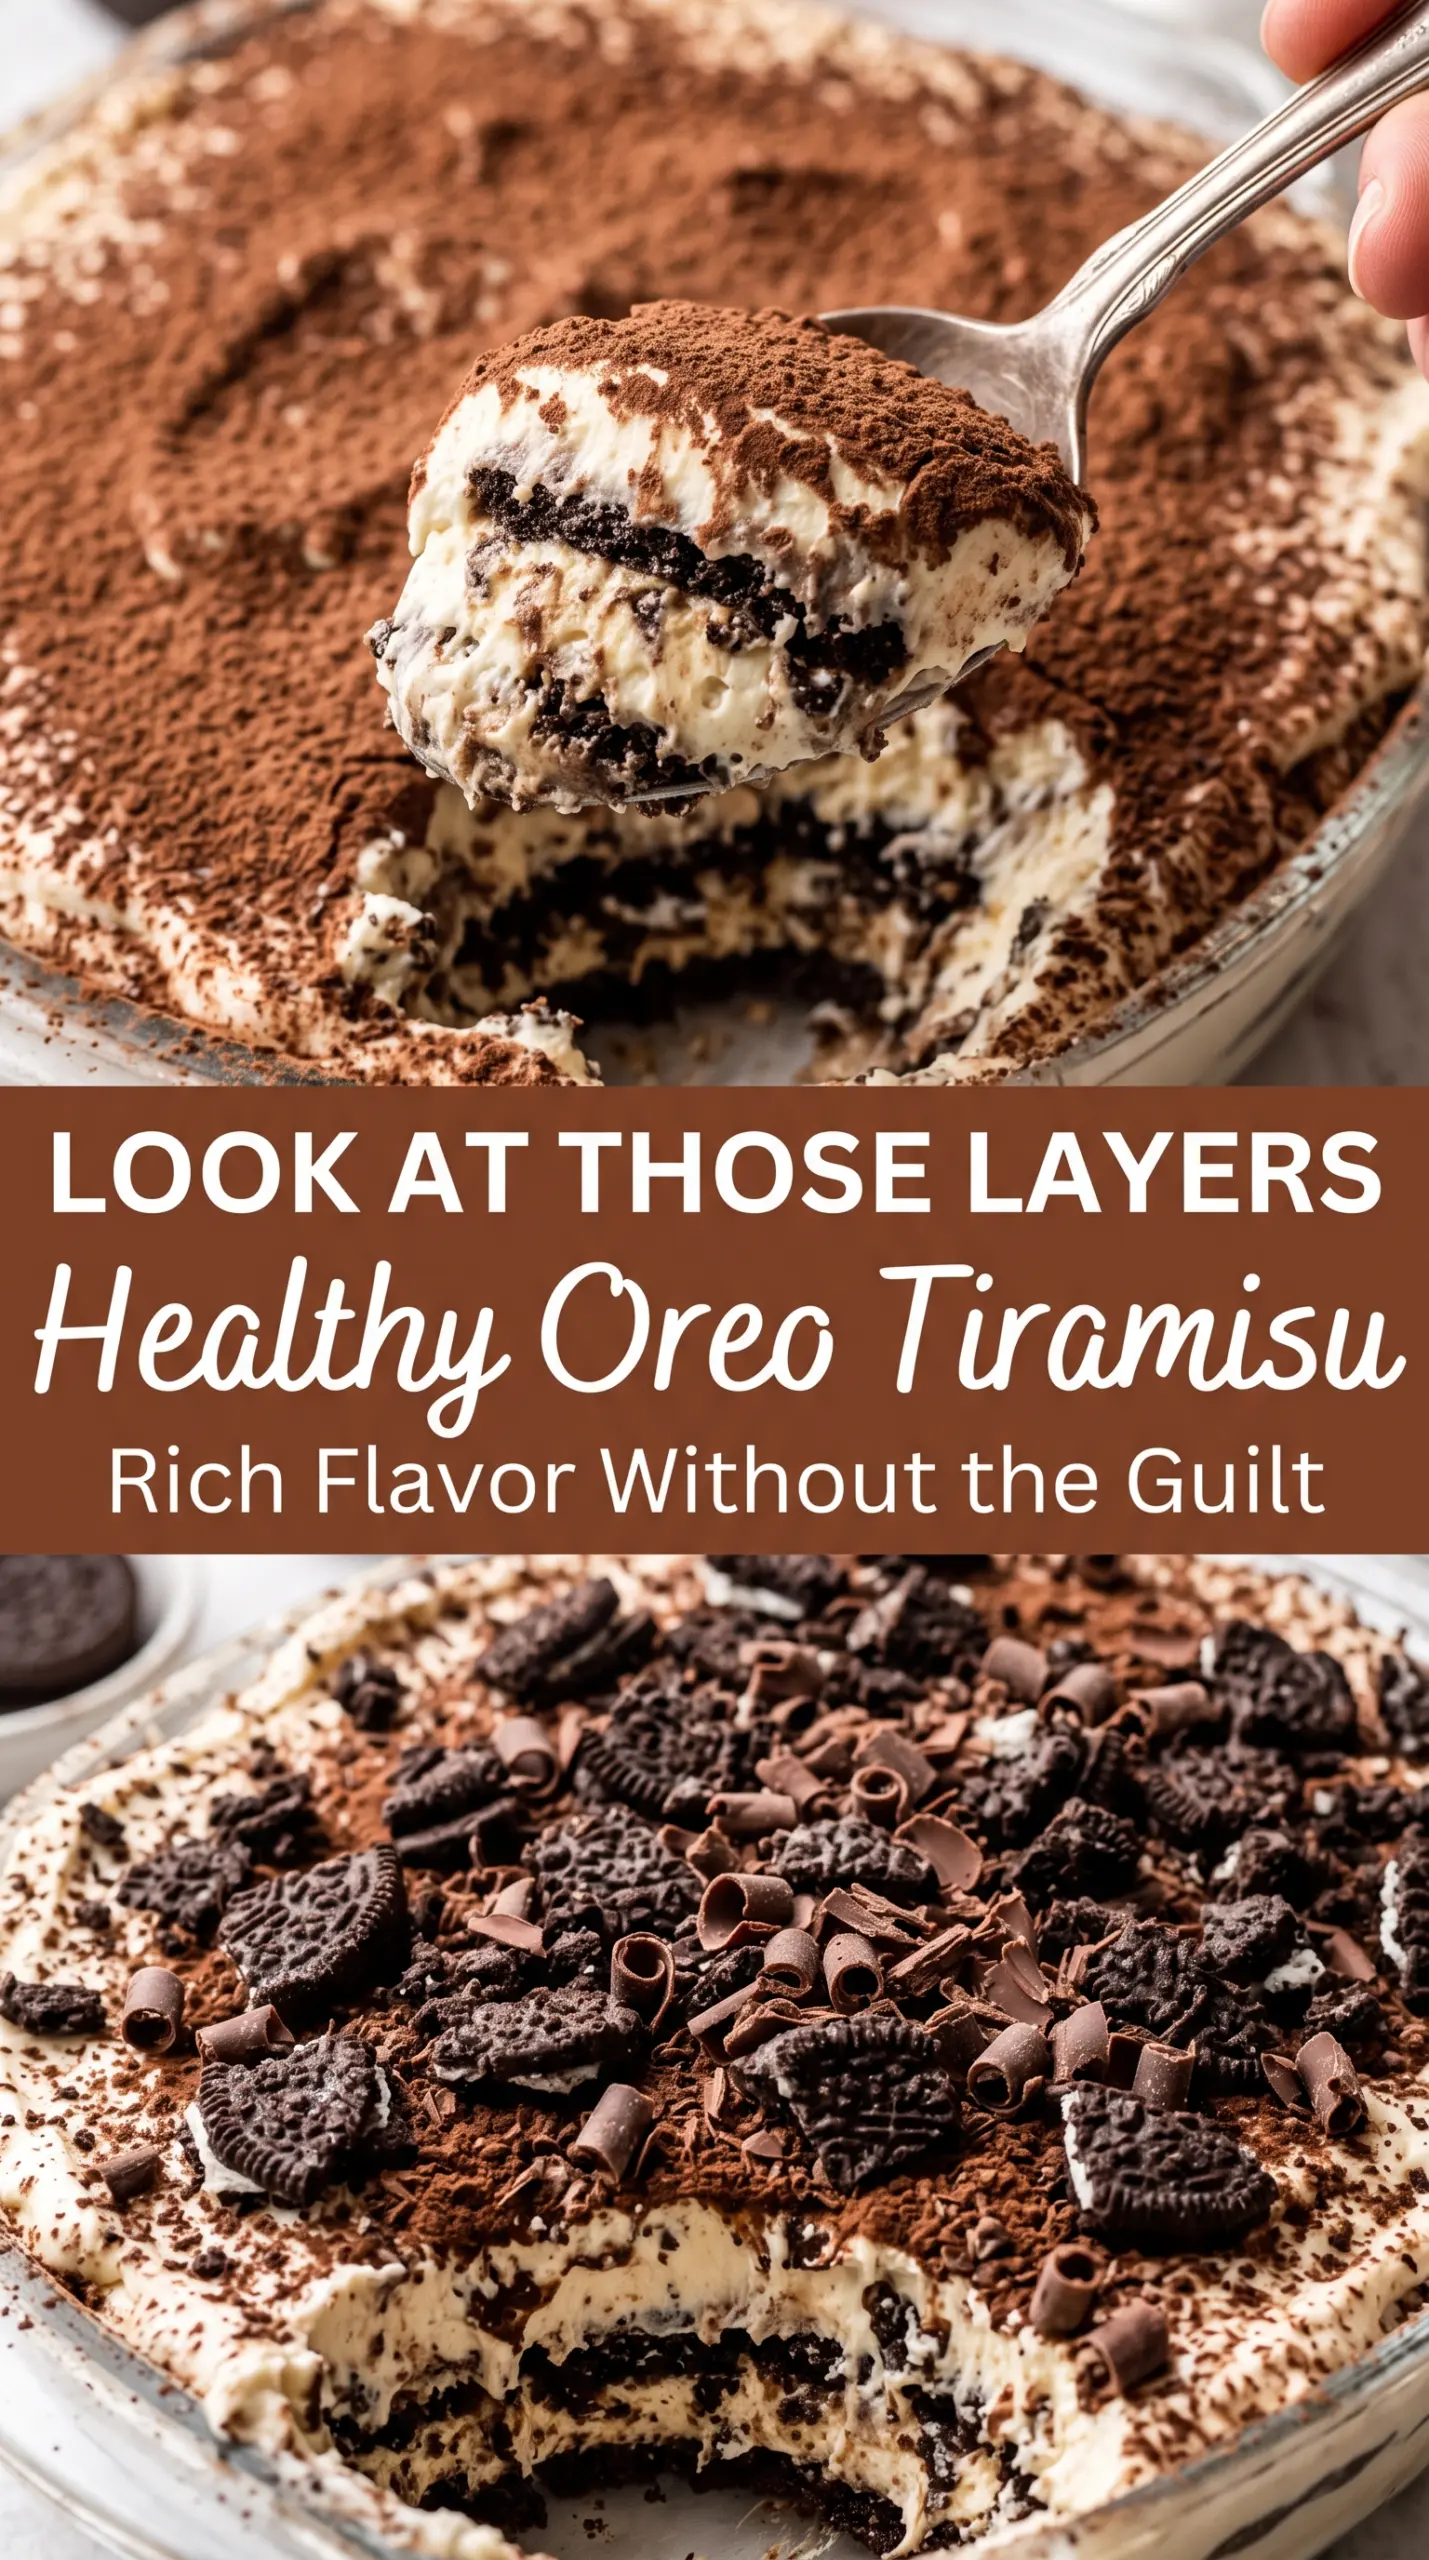
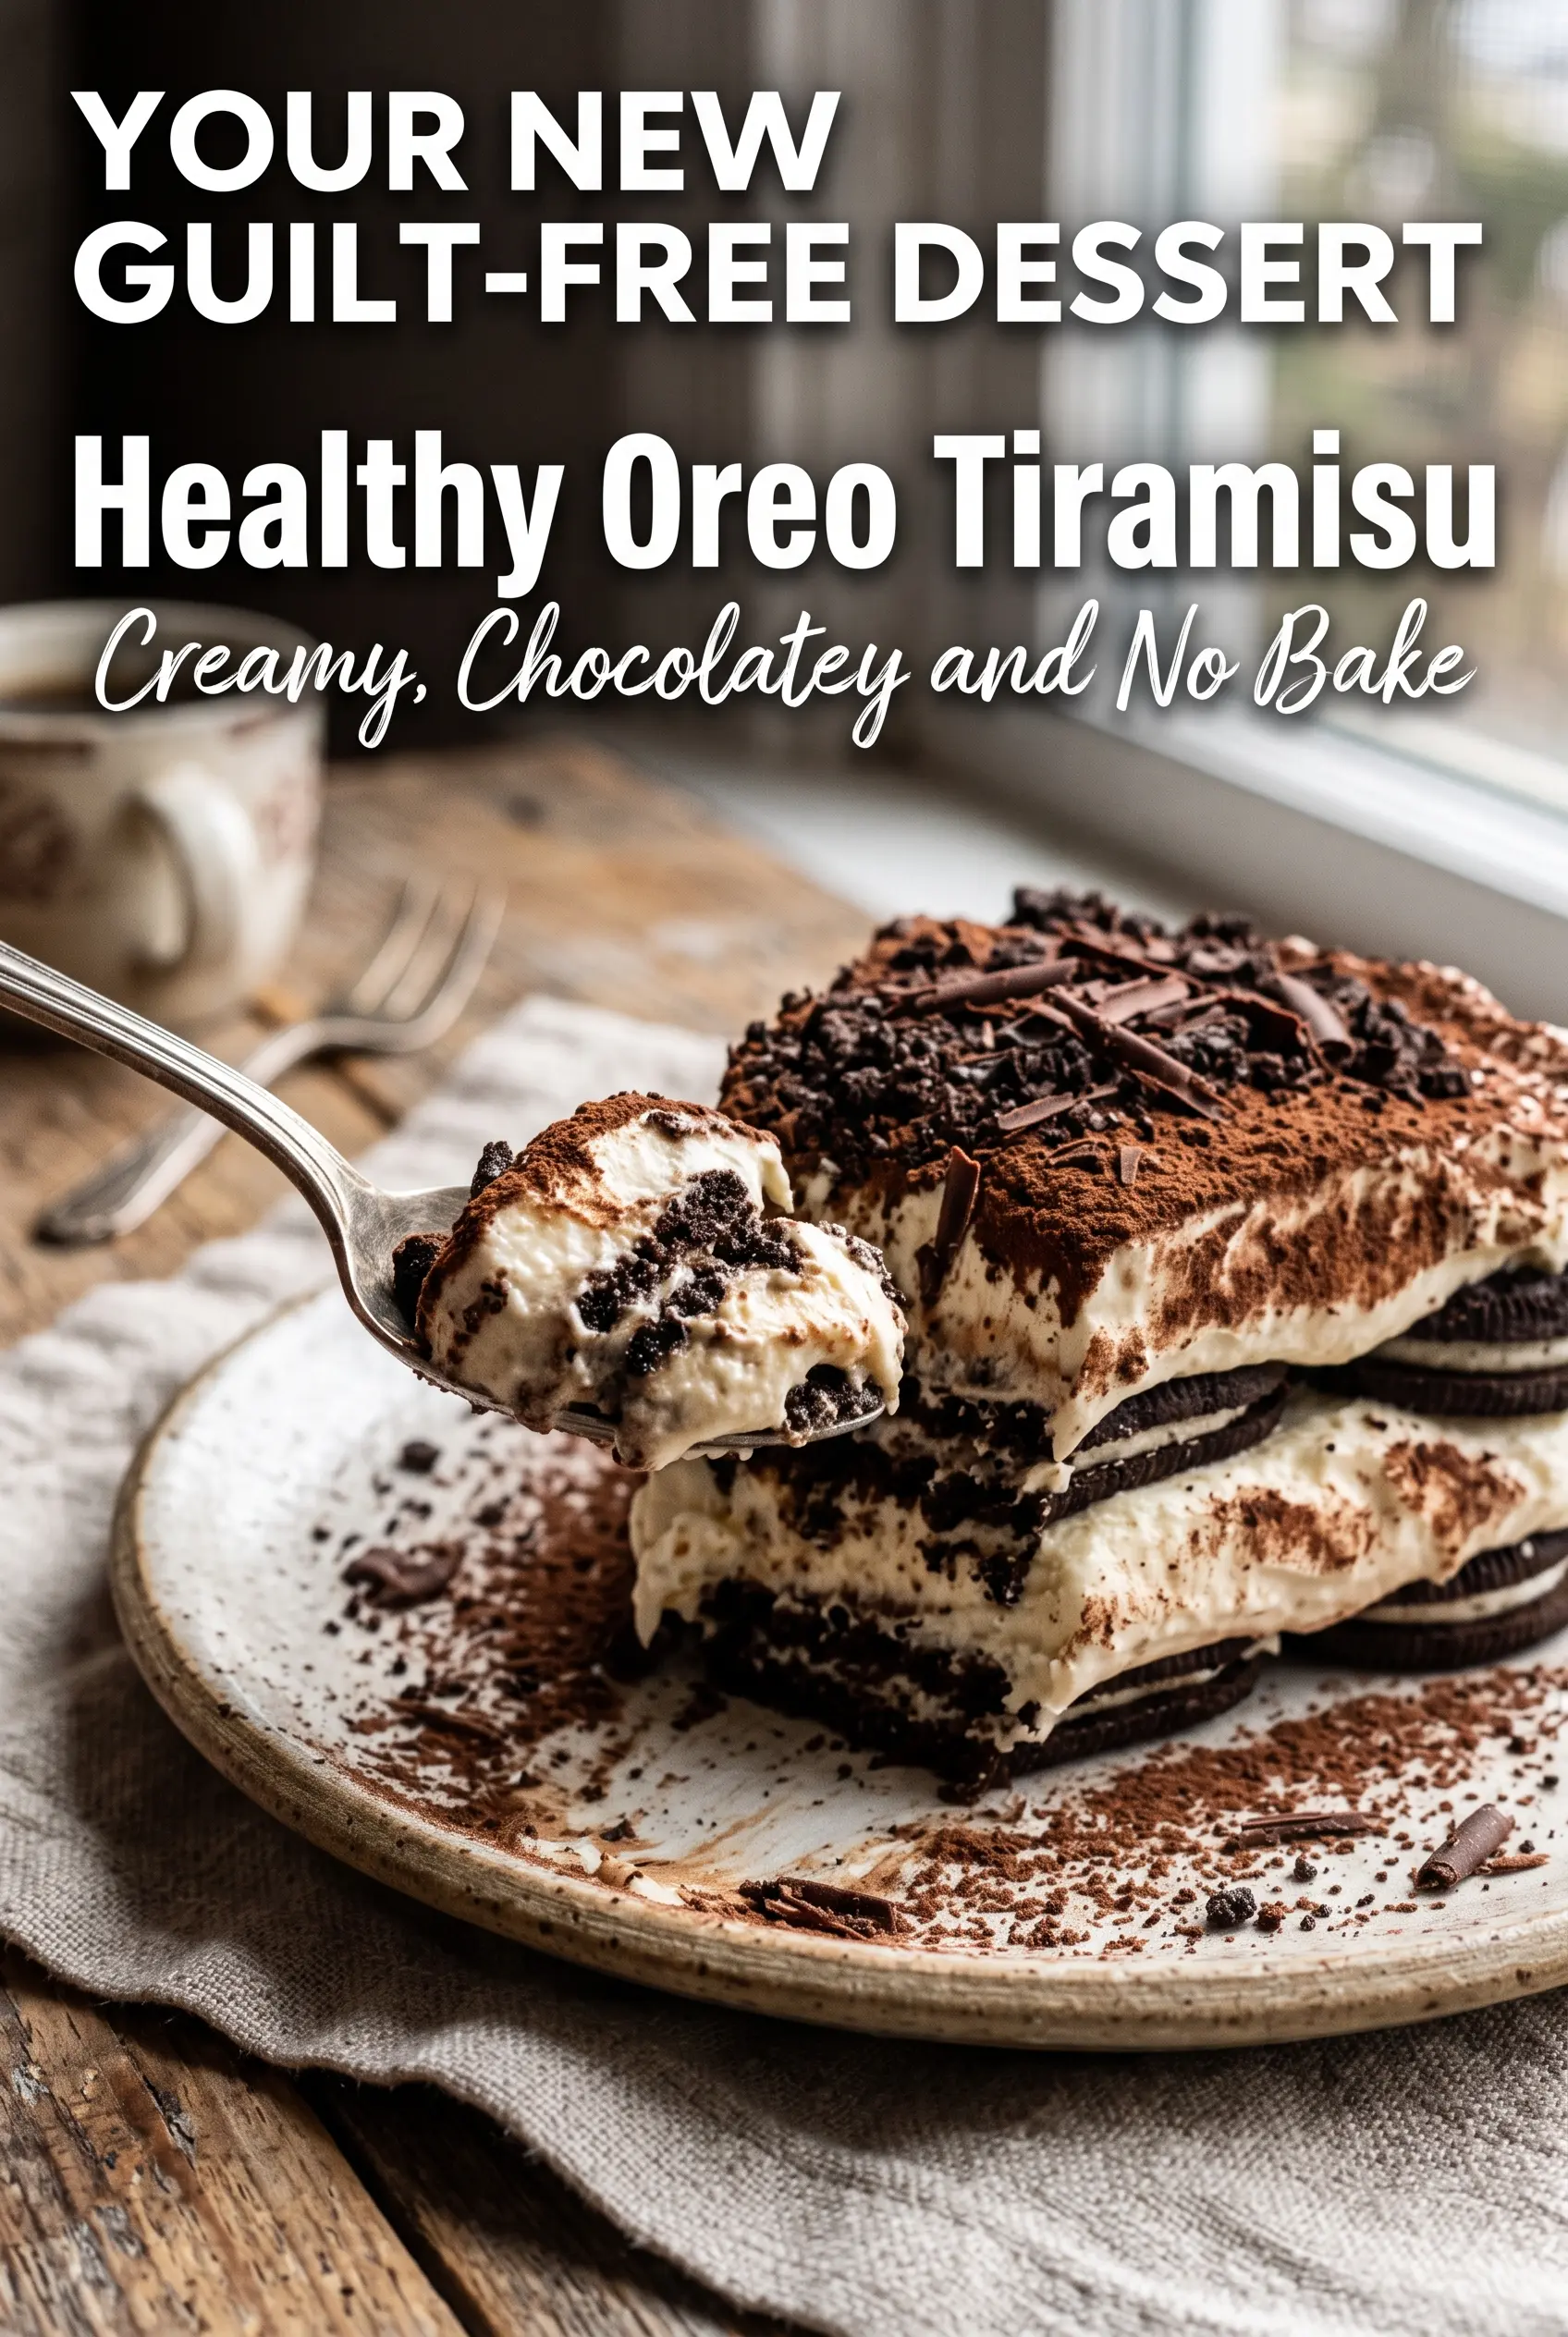
Cold, creamy layers and that familiar cookies-and-coffee bite make this healthy Oreo tiramisu disappear fast. The filling stays light instead of heavy, but it still sets up into clean slices that hold their shape when you serve it. You get the contrast that makes tiramisu so good: soft Oreo layers, a tangy cream filling, and a cocoa finish that tastes like dessert without feeling fussy.
The trick is in the balance. Greek yogurt keeps the filling bright and thick, while light cream cheese gives it enough body to sit between the cookie layers without going loose. A quick dip in cooled coffee is all the Oreos need; leave them in too long and they turn muddy, but a fast dunk gives you that mocha flavor and a little bite left in the cookies. The whole thing needs time in the fridge to firm up, so it’s a great make-ahead dessert when you want something that tastes a little special without turning on the oven.
Below, I’ve included the small details that matter most here: how to keep the cream layer smooth, how to keep the cookies from collapsing, and the best way to change it up if you want a stronger coffee note or a lighter dairy-free version.
The filling set up overnight and sliced cleanly the next day, and the quick coffee dip kept the Oreos from getting soggy. My husband kept sneaking forkfuls straight from the dish.
Love the creamy Oreo layers and coffee soak? Save this Healthy Oreo Tiramisu for a no-bake dessert that slices beautifully and tastes even better after chilling.
The Reason This Tiramisu Holds Its Shape Instead of Turning Soupy
The filling has to be thick before it ever meets the cookies. If the cream cheese is even a little lumpy, the yogurt won’t smooth it out later, and you’ll end up chasing pockets of tangy cream instead of a unified dessert. Beat the cream cheese first until it looks glossy and loose, then add the yogurt and sweetener. That order matters because it gives the dairy a chance to emulsify before the mixture gets diluted.
The other place this recipe can go wrong is the coffee dip. Oreos absorb liquid fast, faster than ladyfingers in classic tiramisu, so a quick dip is enough. You want the cookies stained with coffee, not saturated. If they start breaking in your hand, they’ve already gone too far.
What Each Ingredient Is Actually Doing in This Dish
- Plain Greek yogurt — This is what keeps the filling light and tangy. Full-fat yogurt gives the best texture, but any plain Greek yogurt works as long as it’s thick. If yours seems watery, let it drain in a sieve for 15 to 20 minutes first.
- Light cream cheese — Cream cheese gives the dessert structure and that cheesecake-like richness. It needs to be softened all the way so it beats smooth without tiny lumps. Cold cream cheese is the fastest way to get a grainy filling.
- Maple syrup or honey — Either sweetener works here. Maple gives a deeper, rounder flavor, while honey leans a little brighter. Use the one you like in the final dessert, since both show through in a no-bake filling.
- Oreos — These do the heavy lifting in place of the traditional ladyfingers and cocoa-dusted mascarpone layers. Whole cookies make cleaner layers, while crushed cookies on top give you texture. Double Stuf isn’t necessary here; the standard cookie works best because it doesn’t get overly soft.
- Espresso or strong coffee — This is what gives the tiramisu its signature edge. It should be cooled completely before you dip the cookies, or the cream layer will start to loosen when you assemble the dish.
- Unsweetened cocoa powder — The top dusting cuts through the sweetness and gives that classic tiramisu finish. Natural or Dutch-process both work, but sift it if you want a clean, even layer instead of dusty clumps.
Building the Layers Without Crushing the Cookies
Beat the filling until it looks silky
Start with the softened cream cheese and beat it until there are no lumps at all. Add the Greek yogurt, maple syrup or honey, and vanilla, then mix just until the cream looks smooth and spreadable. Overmixing won’t ruin it, but stopping too soon leaves streaks of cream cheese that show up later in every slice.
Dunk the Oreos for just a second
Pour the cooled coffee into a shallow bowl, then dip each Oreo quickly on both sides. You’re aiming for a darker, softened exterior with a little structure left in the middle. If you hold the cookie under the coffee, it will collapse and muddy the layers.
Spread, layer, and chill
Build the dessert in an 8×8-inch dish with a layer of coffee-dipped Oreos, then half the cream mixture, then repeat. Spread the top layer gently so you don’t drag cookies through the filling. Finish with cocoa powder and the crushed Oreos, then chill for at least 4 hours, though overnight gives the cleanest slices and the best texture.
Three Ways to Adjust the Dessert Without Losing the Texture
Dairy-Free Version
Use a thick dairy-free yogurt and a plant-based cream cheese with a firm set. The texture will be a little softer and the tang will vary by brand, so taste the filling before assembling and adjust the sweetener if needed. This version still chills well as long as both substitutes are thick, not pourable.
Stronger Coffee Flavor
Use espresso instead of regular brewed coffee and add a teaspoon of espresso powder to the filling. That gives the dessert a deeper mocha note without making the cookies soggy. Don’t overdo the coffee in the soak, though, or the layers will lose their definition.
Lower-Sugar Finish
Cut the sweetener back slightly and use fewer crushed cookies on top. The dessert will taste a little more tangy and less like a classic Oreo filling, but the structure stays the same. This works best if you use a good cocoa dusting and let the dish chill long enough for the flavors to settle.
Storage and Reheating
- Refrigerator: Store covered for up to 4 days. The cookies soften a little more each day, which is part of the charm, but the top cocoa layer looks best in the first two days.
- Freezer: It freezes better as individual portions than as one whole dish. Wrap tightly and freeze for up to 1 month, then thaw in the fridge until just softened.
- Reheating: No reheating needed. Serve it cold straight from the fridge; if it’s been frozen, let it thaw fully so the filling isn’t icy in the center.
Answers to the Questions Worth Asking
Healthy Oreo Tiramisu
Ingredients
Method
- Beat the light cream cheese until smooth in a large bowl, using steady strokes to break up any lumps. Stop when it looks glossy and creamy.
- Add the plain Greek yogurt, maple syrup or honey, and vanilla extract to the cream cheese. Mix until light and creamy with no streaks.
- Quickly dip the Oreo cookies into the brewed espresso or strong coffee that is cooled. Keep the cookies moving so they absorb but don’t turn mushy.
- Arrange a layer of dipped Oreo cookies in an 8×8-inch dish. Press them lightly into an even base.
- Spread half of the cream mixture over the Oreo cookies. Smooth the top so it reaches the edges.
- Dip more Oreo cookies into the cooled coffee and arrange a second layer over the cream. Line them up so the layer is even.
- Spread the remaining cream mixture evenly over the second Oreo layer. Smooth the surface to an even thickness.
- Dust the top with unsweetened cocoa powder for a classic tiramisu finish. Use a light, even sprinkle.
- Sprinkle crushed Oreo cookies over the cocoa layer, and add mini Oreo cookies and dark chocolate shavings if using. Scatter them so every slice has a bit of crunch.
- Refrigerate the dish for at least 4 hours or overnight to set the layers. Cover it to prevent the top from drying out.
- Slice and serve chilled right from the refrigerator. Wipe the knife between cuts for cleaner slices.