When a knife slides easily into the center of a baked sweet potato, the flesh is ready to turn into a smooth, naturally sweet filling. That’s the part I watch most closely for this sweet potato casserole with marshmallows: the potatoes need to be tender all the way through, not just soft around the edges.
I bake them whole before peeling and mashing, then stir the filling together with butter, brown sugar, milk, eggs, vanilla, and cinnamon. It’s a straightforward way to keep the prep manageable, and the potatoes can bake while you get the rest of the ingredients ready.
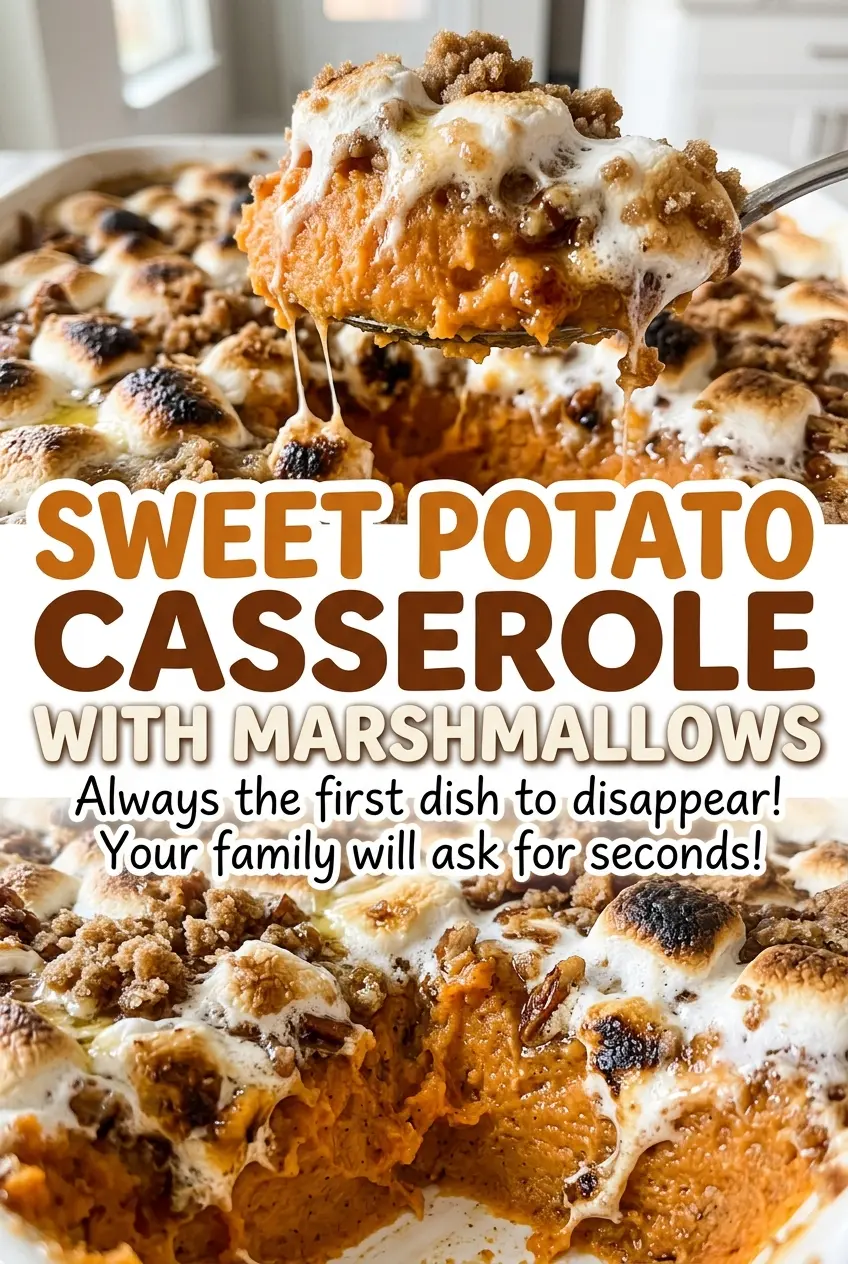
The casserole gets its marshmallow topping near the end, so the filling has time to bake and set before the top turns puffed and golden. Scoop through that soft, warmly spiced center and the layer of toasted marshmallows, and you get the contrast that makes this familiar side dish so satisfying.
Kitchen Note
Let the potatoes cool until they’re easy to handle before peeling. That short pause makes it much easier to remove the skins without juggling piping-hot potatoes.
Save this sweet potato casserole with marshmallows for its soft, spiced filling and golden, puffed topping.
Why This Casserole Starts With Whole Baked Sweet Potatoes
Baking the sweet potatoes whole keeps them from taking on extra cooking water. That matters because the filling needs to be soft enough to mash, but not so wet that it struggles to set once the eggs go in. Instead of draining a pot or trying to judge how much moisture is clinging to cooked pieces, you bake the potatoes until a knife slides easily into their centers.
The potatoes also bring their own sweetness, so the brown sugar can support them instead of carrying the whole dish. Once the flesh is mashed and mixed with the butter and milk, the eggs help the casserole set into a sliceable, tender layer. It won’t be as firm as a savory egg bake; the goal is a soft center that holds together rather than a loose puree.
That balance is why I don’t rush the potato bake or treat the marshmallows as the first thing to focus on. Get tender, well-baked potato flesh, then give the filling its own time in the oven. The topping goes on only after the center has set.
The Ingredients That Keep the Filling Soft, Not Soupy

- Sweet potatoes — Choose firm potatoes without soft spots, and aim for similar sizes so they finish baking at roughly the same time. Scrubbing and drying them before they go into the oven helps keep the skins clean and ready to peel.
- Unsalted butter — Melted butter adds richness and helps the mashed potatoes feel smooth rather than dry. Using unsalted butter lets the kosher salt stay in balance; there’s no need to buy a specialty brand.
- Light brown sugar — Its mild molasses flavor complements the sweet potatoes without taking over. Pack it when measuring so the amount is consistent; dark brown sugar is a useful swap if you want a deeper molasses note.
- Whole milk — Whole milk loosens the mash while keeping it creamy. A thinner milk will make the filling less rich, so whole milk is the better choice when you want the softest texture.
- Large eggs — Beaten eggs help the filling set during its first bake. Stir them in evenly so you don’t end up with patches that bake firmer than the rest.
- Vanilla, cinnamon, and mini marshmallows — Vanilla rounds out the sweetness, while cinnamon gives the filling a gentle warmth. Mini marshmallows cover the surface more evenly than large ones and puff into a continuous golden layer.
The Two-Temperature Bake That Sets the Center Before the Topping
Bake Until the Potatoes Give Easily
Heat the oven to 400°F and line a rimmed baking sheet with parchment paper. Prick the sweet potatoes all over with a fork, set them on the sheet, and bake for 45–60 minutes. They’re ready when a knife slides easily into the centers; if it still catches, give them more time rather than trying to mash them firm.
Cool, Peel, and Mash the Flesh
Let the potatoes cool until they’re easy to handle, then peel them and put the flesh in a large bowl. Reduce the oven temperature to 350°F and grease a 9×13-inch baking dish. Mash the potatoes until mostly smooth; a few soft lumps are fine, but large chunks will make it harder to spread the filling evenly.
Stir Together the Filling
Add the melted butter, packed light brown sugar, whole milk, beaten eggs, vanilla, kosher salt, and cinnamon to the mashed potatoes. Stir until everything is evenly combined, scraping the sides and bottom of the bowl as you go. If you spot streaks of egg or butter, keep mixing until the color and texture look consistent.
Bake Until the Center Sets
Spread the filling in the prepared dish, smoothing it into an even layer so the middle and edges bake at a similar pace. Bake at 350°F for 25–30 minutes, until the center is set and reaches 160°F. The filling should no longer look liquid in the middle; don’t judge it by the edges alone.
Add the Marshmallows for the Final Bake
Scatter the mini marshmallows evenly over the baked filling. Return the dish to the oven for 8–10 minutes, until the marshmallows are puffed and golden. Keep an eye on the surface as it colors; the topping is ready when it has taken on a light golden finish, not when it turns dark.
Two Useful Swaps That Keep the Casserole on Track
Make the Filling Dairy-Free
Replace the butter with an equal amount of unsalted plant-based butter and the whole milk with an equal amount of unsweetened oat milk. The casserole will still contain eggs, but this swap removes the dairy; expect a slightly different, less buttery flavor.
Use Dark Brown Sugar for More Molasses Flavor
Swap packed dark brown sugar for the light brown sugar in the same amount. The filling will taste a little deeper and more molasses-forward, while the rest of the method stays the same.
Storage and Reheating
- Refrigerator: Cover and refrigerate leftovers within 2 hours; they keep for 3–4 days. The marshmallows soften and won’t keep their freshly puffed surface.
- Freezer: Freeze the cooled filling without the marshmallow topping, tightly covered, for up to 2 months. Thaw it in the refrigerator, then reheat and add fresh marshmallows for the final bake.
- Reheating: Warm the covered casserole in a 350°F oven until the center reaches 165°F, then add marshmallows and bake until puffed and golden. Reheating an already topped dish uncovered can brown the marshmallows before the middle is hot.
Questions That Come Up While Making Sweet Potato Casserole
Sweet Potato Casserole with Marshmallows
Ingredients
Equipment
Method
- Heat the oven to 400°F and line a rimmed baking sheet with parchment paper.
- Prick the sweet potatoes all over with a fork, place them on the baking sheet, and bake for 45–60 minutes, until a knife slides easily into the centers.
- Let the sweet potatoes cool until easy to handle, then peel them and place the flesh in a large bowl.
- Reduce the oven temperature to 350°F and grease a 9x13-inch baking dish.
- Mash the sweet potatoes until mostly smooth.
- Stir in the melted butter, brown sugar, milk, eggs, vanilla, salt, and cinnamon until evenly combined.
- Spread the sweet potato mixture in the prepared baking dish.
- Bake for 25–30 minutes, until the center is set and reaches 160°F.
- Scatter the marshmallows evenly over the top and bake for 8–10 minutes, until puffed and golden.